-
Locate the quarter panel bolt closest to the firewall inside the engine bay and remove it. Replace it with a ball stud and a washer from the kit.

-
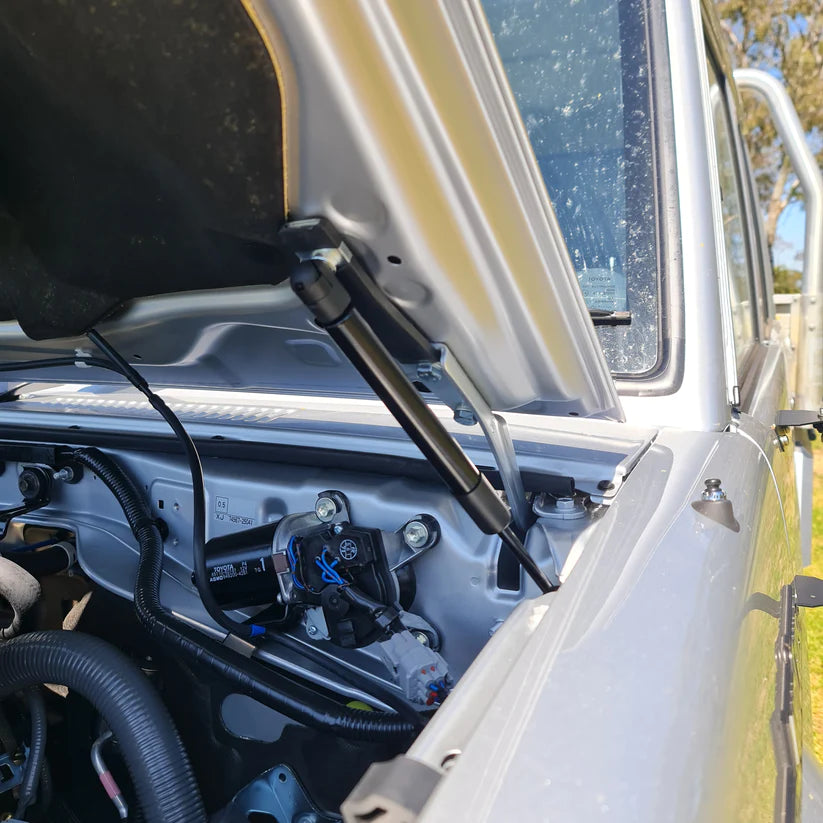
Remove the bonnet hinge bolts and place the bracket in position using the longer bolts and washers included in the kit. Ensure that the ball stud is facing downward. If the bonnet feels unstable, remove one bolt at a time to keep it in place. Note the brackets are side specific


-
Attach the gas strut by pushing the gas tube end of the strut onto the upper ball stud as shown below.
-
With the assistance of a friend, lift the bonnet as high as possible to attach the bottom end of the strut.

-
If you experience difficulty attaching the lower end, slightly loosen the bolts on the bracket and pull the bracket out towards the front of the vehicle.
-
Repeat on the other side and you're all done!
For vehicles with Autonomous Braking System: You may need to unclip and move the circled connection below on the drivers side of the engine bay. It will slide back towards the firewall, you can then cable tie it down lower.


With these simple steps, your Land Cruiser's bonnet will open and close smoothly with the help of our bonnet strut kit.
If you are having trouble please feel free to email us at info@thecruiserstore.com


