
Below are instructions on installing our UHF/Phone bracket to suit 76, 78 & 79 Series with the updated dash 2009+. The instructions show a UHF microphone bracket for the right hand side, installation is the same for any of these brackets left or right.
What you will need:
1 x Flat Blade Screw Driver
1 x Phillips head screw driver (Long shaft)
Step 1:
Use the flat blade screw driver to carefully pry the head unit surround outwards. There are 2 slots at the bottom of the surround to pry on. Once the surround has popped out a bit use your hands to pull it out the rest of the way. Your can then flip it on top of your dash or remove electrical plugs and set it aside.


Step 2:
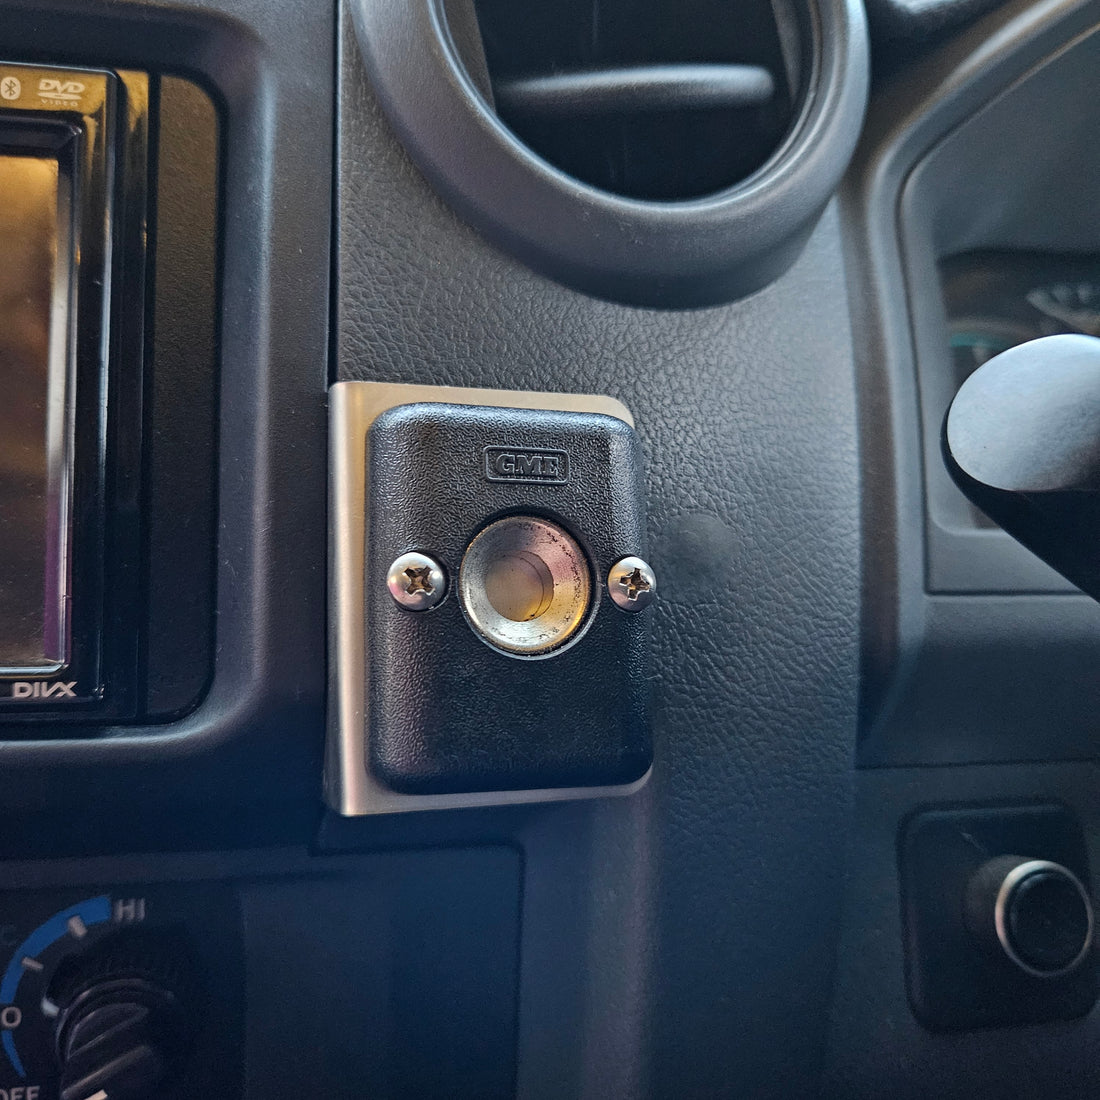
Mount the UHF or phone mount you are using to the bracket before installing into the dash. Use supplied self tapping screws or you may also choose to use pop rivets (not supplied). You may use the supplied rubber block to reduce vibration, however, it is generally not necessary unless you have a heavy phone mount with a large phone. The rubber block can also be a good gauge on how far inwards to position the bracket, and avoid the screws contacting the dash.


Step 3:
Position bracket in place, it must sit behind the plastic tab as seen in below images. While holding in the correct position use a long shank Phillips head screwdriver to screw the 2 supplied self tapping screws into the plastic wall. These screws must only be done up hand tight as not to strip the plastic wall out, the plastic surround also helps hold the bracket in place so the screws don't have a lot of pressure on them. Please note we are not picking up OEM holes we are making our own with the self tapping screws.


Step 4.
Re-install plastic surround, don't forget to clip in electrical connections if they were removed. Carefully line up the plastic clips and push them into place.

